Matt Godden

human : artist

Bring content into view.

Category : fixing

Fixing software with other software.

Fixing Image Capture with PLIST Edit

Image Capture is an application included with macOS, which acts as a general image ingester, and scanner interface. You plug a device in, and Image capture looks at all the files available on it, then gives you the option to download them to your chosen location, or application.

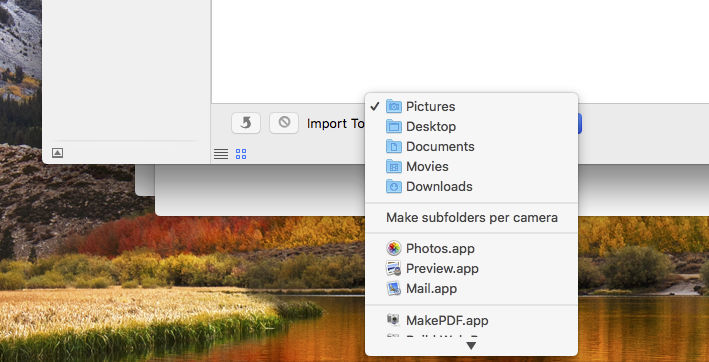
The basic UI, is this:

Image Capture in macOS High Sierra

Or at least, that’s how it looked.

The most salient point is that option “Make subfolders per camera”. What that does when checked, is that whatever folder you choose to copy files into, Image Capture will first make a folder with the name of your device. Great if you’re copying images in for the first time, but if you already have a previously established folder for device images, not something you’d want to have enabled.

What went wrong:

In recent versions of macOS, this checkable menu option is no longer visible, which means you lose the ability to control that aspect of the software, and the default is to create the device subfolder. *eugh*

Anyway, a bit of research online indicted tht the setting might be controlled in the .plist file for Image Capture, located at:

~/Library/Preferences/com.apple.Image_Capture.plist

…and sure enough

The nefarious property

Fir enough, I’ll open it in a text editor, and just change <true/> to <false/>

Except… it’s a binary .plist file, and opens as garbage text. Yes, only Apple could make a plain text XML preference file system, into binary files that require a special developer tool to modify them.

So, off to the Mac App Store, and there’s a simple tool PLIST Edit. $10, done.

Open the plist file in it, change the value to False, save, relaunch Image Capture, and:

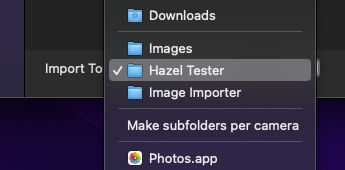
Prodigal menu returns

Make subfolders per camera is back. Huzzah.


Fixing a Wacom Intuos 4 under macOS Ventura, with Keyboard Maestro.

Among the various changes happening in macOS under macOS 13 Ventura, is a problem with Wacom’s Intuos 4 graphics tablets. Following is a way to use Stairways Software’s Keyboard Maestro to solve the particular glitch thrown up by this hardware / driver / operating system combination.

The Symptom:

Upon waking from sleep, the OLED screens on larger size Wacom Intuos 4 tablets my be unresponsive. While all the hardware appears to function, and the controls for the screen brightness are accessible, the screens themselves remain inert.

The Cause:

The problem appears to be a result of the driver not working correctly over the sleep / wake cycle.

Troubleshooting:

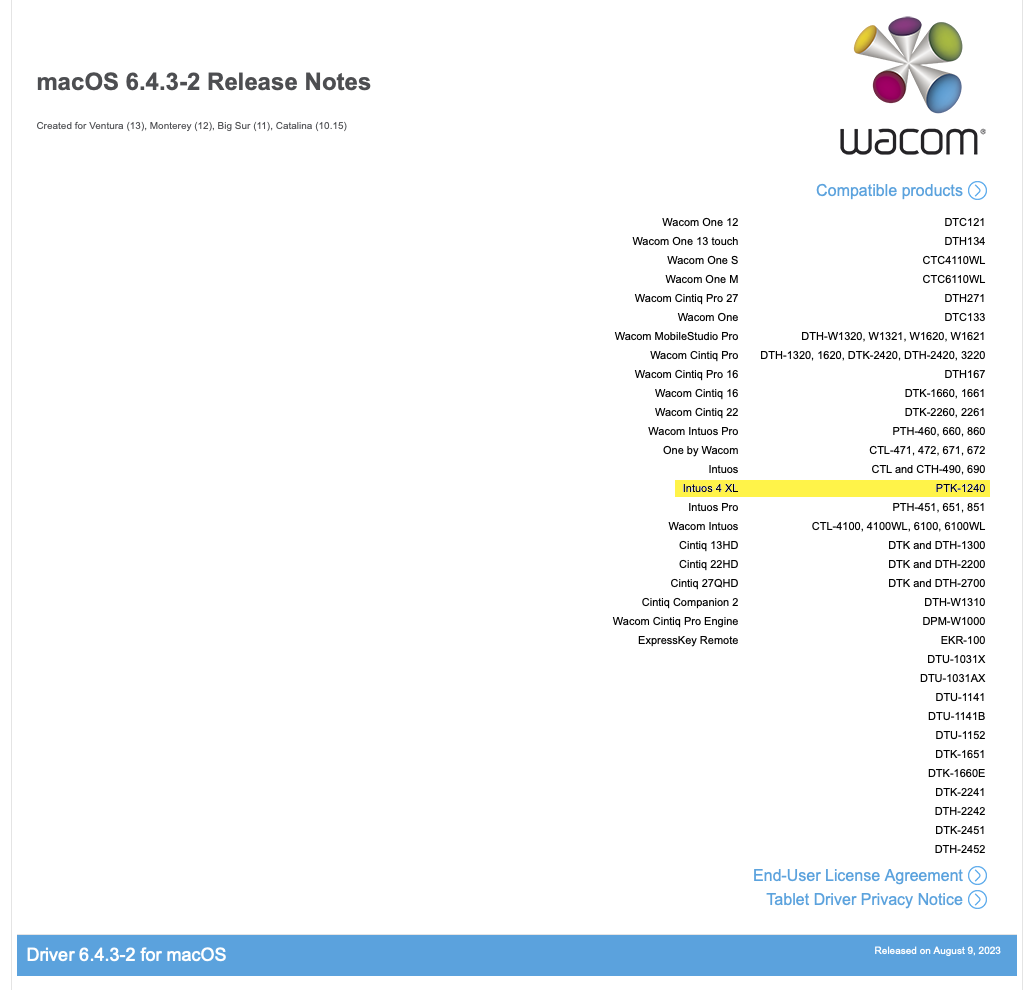
I contacted Wacom support, and despite their driver notes showing device compatibility for my tablet clearly written:

…the support representative claimed that the Intuos 4 XL became unsupported after the previous driver, which does not support macOS Ventura.

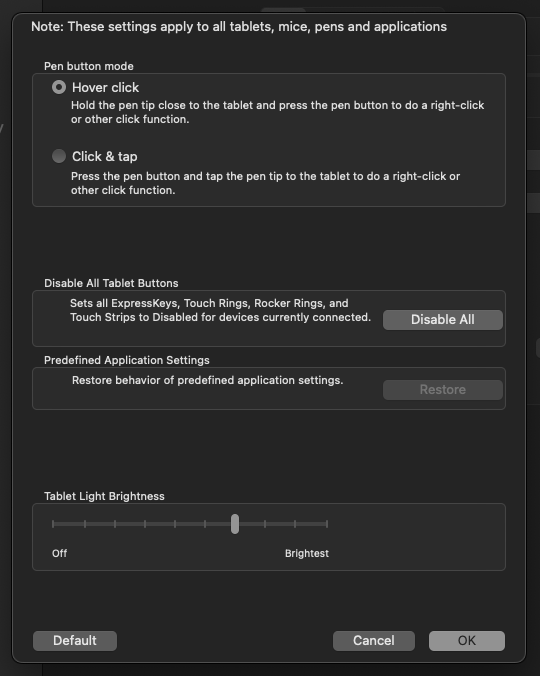
To be clear, if it’s “unsupported”, one would question why the driver settings show this:

…that “Tablet Light Brightness” feature? Those OLED screens were removed from Wacom tablets after the Intuos 4. There are no newer tablets with those screens, so if the tablet isn’t supported by the driver, why is that there?

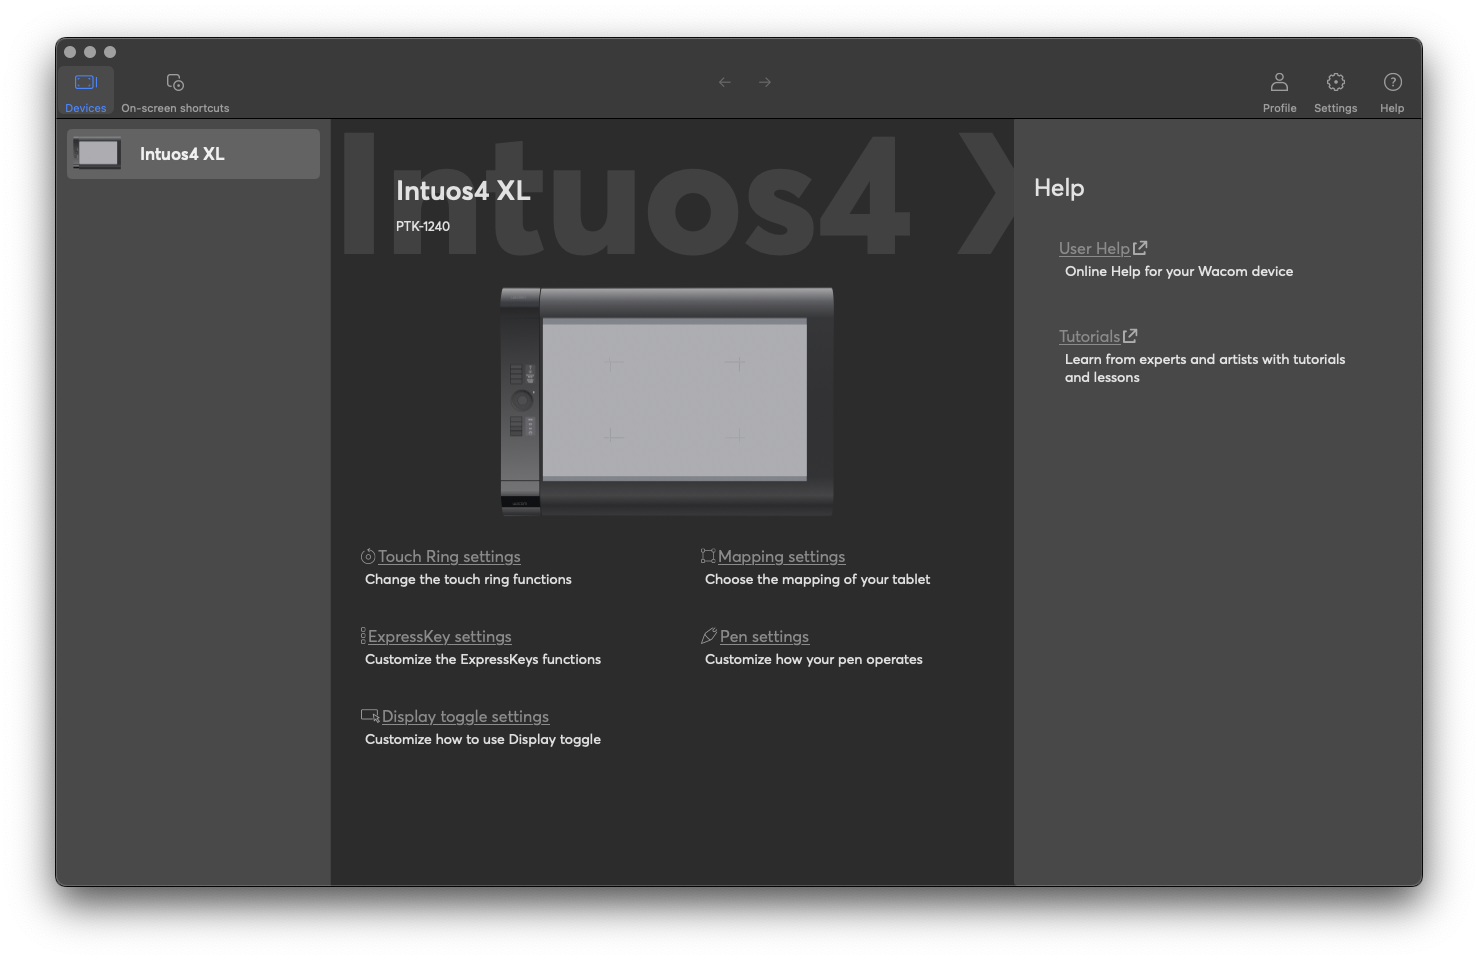
We could also check out the Wacom Centre app, which is used to… well it doesn’t really seem to do anything necessary. It’s effectively a thing that checks for driver update status, and provides shortcuts to the Wacom System Settings pane.


That’s “unsupported”? Really?

So on to…

The Solution.

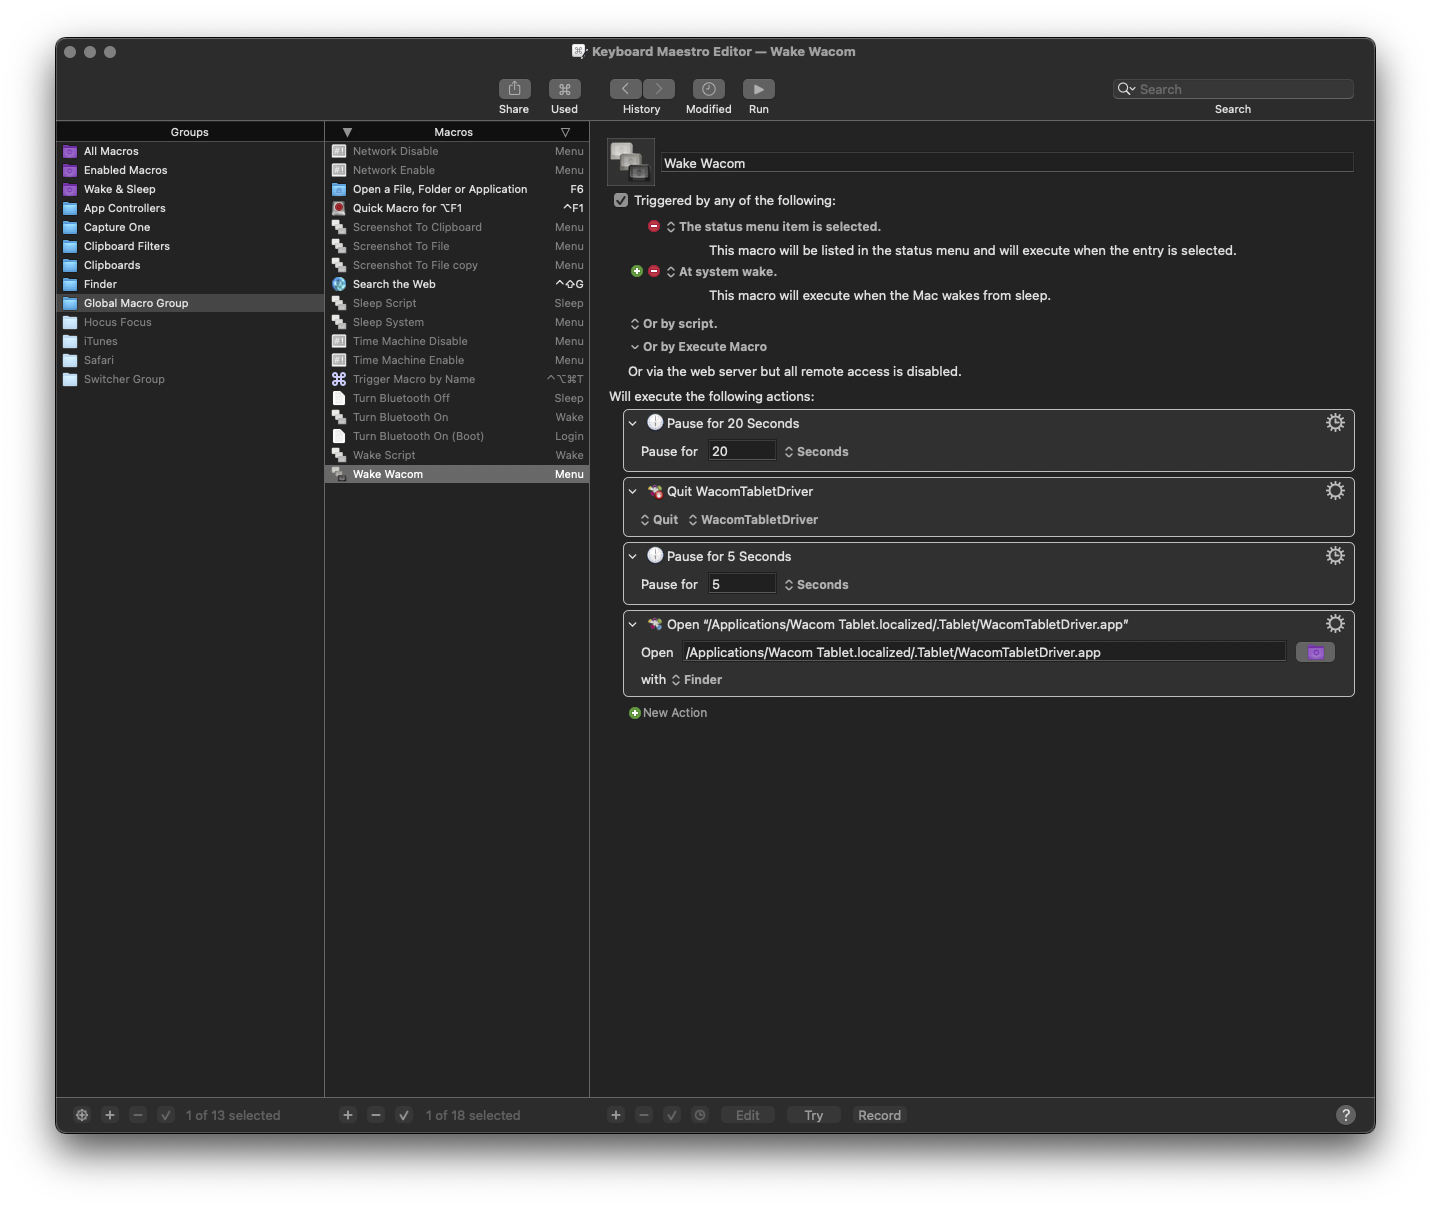
Fixing this problem is a simple matter of quitting and re-launching the tablet driver. You can use Wacom Tablet Utility to do this manually, or you can use Keyboard Maestro to add a set of events to do this as a menu command, or as something that runs automatically upon wake, thus:

So what this macro is doing is it’s triggered by either the Keyboard Maestro menulet app, OR triggered by waking up from sleep. It waits 20 seconds, so that the wake process is out of the way and settled if it’s triggered by a Wake event, then it quits the driver, waits, and launches it again. You’ll need to reveal hidden files and folders to navigate to it, in order to populate the app’s location.

Problem solved.


Fixing Capture One, with Keyboard Maestro.

Capture One is a RAW photo developer, editor and Digital Asset Manager app. It’s my current go-to as a long-term replacement for Apple’s long-discontinued Aperture.

In general, it has better image processing than Aperture, but falls down a bit on the DAM side of things. It can’t import directly from iOS devices, and doesn’t have export to iOS device integration through iTunes. It also lacks Aperture’s “Flag” option, which is super helpful for doing a first pass through a shoot, and flagging images as keep, or not, before filtering for flagged, and going on to subsequent passes for assigning star ratings.

The biggest problem from a fast workflow perspective, is in how it handles a multiple-display setup. You have your thumbnail Browser window open on one screen, and the image Viewer window open on another. When you click on a thumbnail, although the image is displayed in the Viewer, the application’s focus remains on the Browser. This means keyboard shortcuts to control the zoom level of the image are captured by the  Browser window, and not passed through to the Viewer. As can be seen in this video:

The workaround was to have to manually click on the Viewer window, to bring it into focus, then do the zoom keyboard shortcuts, and back and forth for every image.

This really defeats the purpose of shortcuts, which are designed to minimise unnecessary mouse movement.

I spent almost a year holding off committing to Capture One (after purchasing it) over this, before discovering Keyboard Maestro.

What Keyboard Maestro does is sit in the background, capture keystrokes, and use them to trigger various workflows & macros.

In this case, I configured it to listen for the keyboard shortcuts I had previously used in Capture One for the zoom-to-100%, & zoom-to-fit commands. I then configured it to generate two keystrokes in succession, in response to each of those original keyboard shortcuts.

  • The first, is the keyboard shortcut to make the Viewer the active window.
  • The second, is a reassigned shortcut for zoom-to-100% & zoom-to-fit respectively.
Use a Group to limit the macro’s scope to Capture One.
Set up the chain of keystrokes, triggered by the first.

So, the process now is:

Select a thumbnail, then:

  • Press the Key originally used to zoom to 100%.
    • Keyboard Maestro grabs the keystroke, and uses it as a trigger to fire off:
      • Keyboard Shortcut to make the Viewer window active, then
      • Reassigned Keyboard Shortcut to set the Viewer zoom to 100%.

Or:

  • Press the Key originally used to zoom to fit.
    • Keyboard Maestro grabs the keystroke, and uses it as a trigger to fire off:
      • Keyboard Shortcut to make the Viewer window active, then
      • Reassigned Keyboard Shortcut to set the Viewer zoom to fit.

The neat thing, is that using the shortcut to make the Viewer active while the Viewer is already active doesn’t seem to cause any problems, so there’s no need for conditional logic to test which window is currently active.

All in all, this is an elegant solution to a problem that seemed hopeless.

If this helped you, maybe go buy one of my eBooks.


#FixedItForYou

If you’re a user of Apple’s macOS, and you’re still using macOS 10.13 High Sierra, 10.12 Sierra, or earlier, you might have noticed that iCloud stopped working around April 7th, depending on your time zone.

The Problem:

The symptoms, apart from sync & iCloud Drive not working for the system, or apps that use iCloud, are that you can’t access the iCloud.com website in Safari, while it works fine in Firefox.

Looking into Safari’s Web Inspector, reveals the following:

Going into the iCloud preference pane in System Preferences (which looks like it’s logged in and everything is fine) and attempting to access your Account Details, brings up an error connecting to iCloud.

If you then decided to log out of iCloud, which is about the only troubleshooting technique Apple offers, and you decide to remove iCloud data from your Mac so as to completely clean it out, you will find yourself unable to log back in:
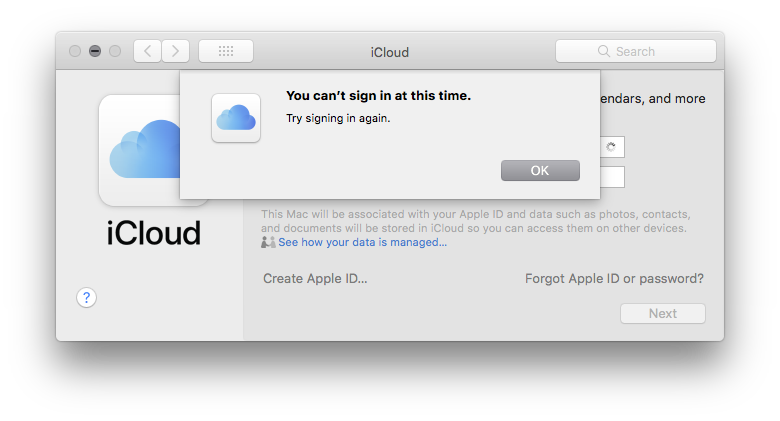
This leaves you without any contacts, calendars, Safari passwords, and probably breaks the ability to use Airdrop and Handoff etc.

So what’s going on?

From the Safari web inspector errors, it looks to me like Apple has broken / made incompatible something in the security certificate used by the iCloud server infrastructure. This was probably in the process of fixing an iCloud outage that had been going on in the days beforehand. Since these versions of macOS aren’t “supported”, one assumes this happened because they weren’t tested.

However, this issue does seem reminiscent of an issue from 2020, when Safari on High Sierra lost the ability to access all of Apple’s web services that ran through idmsa.apple.com (which includes Apple’s discussion forums, iTunes Connect etc). So after a bit of searching, I found the solution as was posted then, and tried it out.

The Solution:

If you go to Apple’s discussion forms, here:

https://discussions.apple.com/thread/251211674?page=3

You’ll see the solution – which involves downloading a new security certificate from Apple, and installing that in your Login keychain.

That fixes the problem.

Instantly.

No rebooting, no nothing. It’s fixed so quickly, that if the next thing you do, is switch to Safari and hit Reload on iCloud.com, or switch to the iCloud Prefpane and hit Account Details, it works immediately.

So, there you are, trillion dollar company, a big problem for a fair chunk of your userbase, just fixed for you, free of charge.

This certificate expires in May, I don’t know what will happen then – if Apple will have fixed things in the meantime, or if you’ll just need to keep replacing these certificates periodically, or if there’s a different certificate you can use that’ll be more permanent. If I find that out, I’ll update this.

EDIT May 21: The certificate expired at 1:45am Australian Eastern Time, and everything broke again, aside from getting Account Details in System Preferences.

Until Apple issues an updated certificate, a temporary workaround is to open Keychain Access, go to Login Keychain. View Menu > Show Expired Certificates. Right click on the  CA 2 – G1 certificate, go to the Trust Section, and set “When Using Certificate” to: Always Trust.

That will fix it instantly.

Edit May 22: It’s broken again, and nothing appears to fix it.

Edit May 23: In Keychain Access, System Keychain, changing the trust settings for GeoTrust global SA to “Always Trust”, fixes the problem instantly.

Edit May 25: Apple PKI issued a new certificate which solves al the problems, and allows you to reverse the Always Trust changes for the expired certificates.

If this helped you, maybe go buy one of my eBooks.